
Quick answer
AI can now turn a text prompt or reference image into a textured 3D model surprisingly quickly.
But a model that looks good in an AI preview is not automatically a game-ready asset.
A production workflow should look more like:
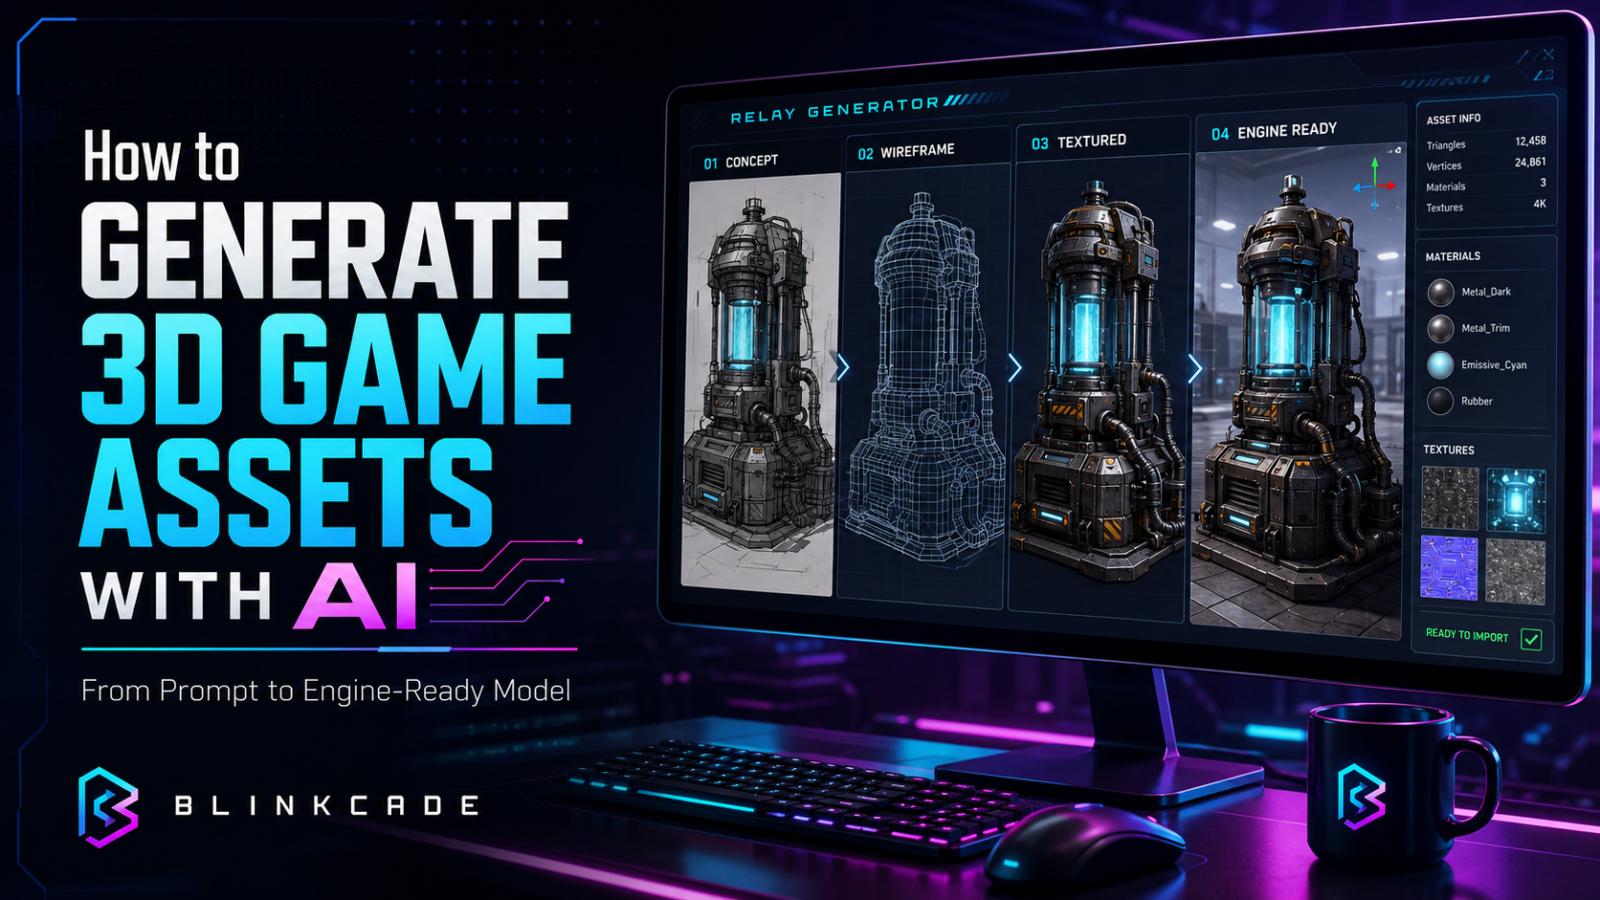
asset brief → reference → AI generation → geometry inspection → remesh/retopology → UV inspection → texture cleanup → scale and pivot → collision → LODs → export → engine import → in-game validation
than:
prompt → download → ship.
Current AI 3D platforms such as Meshy and Tripo can export common real-time formats including FBX and GLB. Meshy currently provides generation, remeshing, texturing and rigging workflows, while Tripo supports formats including GLB, FBX and OBJ.
For Unity and Unreal projects, FBX remains a particularly practical interchange format. Unity’s current documentation describes FBX as its primary supported model format, while Unreal maintains an extensive FBX content pipeline for static meshes, skeletal meshes, materials and LODs.
The real skill is no longer merely generating the model.
It is turning generated geometry into an asset that behaves correctly inside a game.
What makes a 3D model game-ready?
Imagine asking an AI tool:
Generate a futuristic supply crate.
A few minutes later, you have something that looks excellent in a turntable viewer.
That model might still have:
- 400,000 triangles
- messy or stretched UVs
- overlapping geometry
- holes in the mesh
- an origin in the wrong place
- baked lighting inside the base-color texture
- five unnecessary materials
- no useful collision
- inconsistent real-world scale
- geometry that breaks when animated
- details players will never see
- textures much larger than the game needs
None of those problems necessarily show up in the promotional render.
A game engine cares about more than appearance.
For a production asset, you need to think about:
geometry
topology
materials
textures
UVs
scale
orientation
pivot
collision
performance
animation requirements
engine compatibility.
AI helps create the starting point.
The rest is an asset pipeline.
Step 1: Define the asset before generating it
Let’s build an example asset for a fictional Blinkcade game:
The Relay Generator
It’s a small environmental machine used throughout a science-fiction level.
Before opening an AI generator, create an asset contract.
ASSET
Relay Generator

TYPE
Static environment prop

PURPOSE
Provides recognizable power infrastructure throughout the level.

TARGET ENGINE
Unity and Unreal compatible

STYLE
Stylized science-fiction industrial machinery

SCALE
Approximately 1.4 meters tall

SHAPE
Vertical rectangular generator
Wide stable base
Large central energy chamber
Protective frame around chamber

MATERIALS
Painted dark metal
Brushed steel hardware
Cyan emissive energy chamber

DETAIL LEVEL
Medium
Readable from approximately 5–15 meters

TARGET
Desktop / console real-time game

ANIMATION
None

COLLISION
Simple solid obstacle

AVOID
Tiny cables
Floating pieces
Text labels
Logos
Extremely thin geometry
Complex open interiors
Excessive surface noise
That prompt already contains production information.
We’re not asking for:
a cool futuristic generator.
We’re telling the system what kind of object our game actually needs.
Step 2: Decide whether to use text-to-3D or image-to-3D
There are two common starting workflows.
Text → 3D
Useful when:
- you’re exploring ideas
- shape precision is less important
- you don’t already have concept art.
For example:
Stylized science-fiction relay generator.

1.4 meter tall industrial machine.
Stable rectangular base.
Protective dark-metal frame.
Large cylindrical cyan energy chamber in center.
Chunky mechanical shapes.
Medium surface detail.
No labels.
No exposed tiny cables.
No floating components.
Designed as a static real-time game prop.
Image → 3D
Often better when:
- art direction matters
- proportions need to match an approved concept
- you want several assets from the same visual language.
A strong workflow can therefore be:
AI concept image
↓
approved visual reference
↓
image-to-3D
↓
cleanup
rather than generating both the design and the geometry from scratch at the same time.
Step 3: Inspect the geometry before looking at the texture
One of the easiest mistakes is being distracted by a beautiful texture.
Turn the texture off.
Look at the mesh itself.
Ask:
Is the silhouette right?
From several meters away, does it still look like the Relay Generator?
Are there holes?
Rotate underneath and behind it.
Is anything floating?
AI models sometimes create decorative geometry that isn’t properly attached.
Are surfaces unnecessarily dense?
A flat steel panel doesn’t need thousands of triangles.
Are thin pieces likely to cause trouble?
Tiny rails, cables and antennae can increase complexity without adding meaningful gameplay value.
Is the object symmetrical where it should be?
Generation errors may create subtle distortions.
Inspect:
front
back
left
right
top
bottom.
A textured beauty render can hide many of these defects.
Wireframe cannot.
Step 4: Understand triangle count in context
There is no universal correct polygon count.
A 30,000-triangle hero prop may be perfectly reasonable.
A 30,000-triangle screw sitting on a crate probably isn’t.
The correct question is:
How much geometry does this asset need for the way the player will actually experience it?
For our Relay Generator:
- medium-sized environment prop
- frequently repeated
- usually viewed from several meters away
- no deformation
we probably want relatively economical geometry.
If AI generation produces an extremely dense mesh, remesh or retopologize it.
But never judge optimization solely by triangle count.
Inspect whether the reduction damaged:
- silhouette
- hard edges
- circular forms
- UVs
- shading.
The best optimized mesh is not the one with the fewest triangles.
It’s the least expensive mesh that still gives the game the required visual result.
Step 5: Inspect topology
Topology becomes particularly important for characters and anything that deforms.
For static environment props, the requirements are usually more forgiving.
Still inspect for:
- extremely long thin triangles
- accidental internal geometry
- disconnected components
- duplicated surfaces
- non-manifold edges
- overlapping faces
- bad normals
- chaotic density.
For an animated character, go much further.
Inspect:
shoulders
elbows
knees
hips
face
hands.
A gorgeous AI-generated character can deform terribly if edge flow isn’t suitable for rigging.
That means the workflow for an animated hero may be:
AI generation
↓
retopology
↓
UVs
↓
texture projection/bake
↓
rigging
rather than attempting to animate the raw generated mesh.
Step 6: Check the UV map
A textured model needs a way to map its 2D texture onto its 3D surface.
That’s the UV map.
AI-generated models can have technically functional UVs that are still inconvenient for production.
Look for:
- severe stretching
- huge empty areas
- tiny important islands
- unexpected overlaps
- inconsistent texel density
- too many fragmented islands.
For our generator, ask:
Does the energy chamber have enough UV space?
Are the sides and back receiving reasonable detail?
Does one tiny bolt consume as much texture space as an entire panel?
If the UV layout is poor, rebuild it before investing heavily in texture cleanup.
Step 7: Inspect the material maps separately
A modern game asset may use physically based rendering maps such as:
Base Color / Albedo
surface color without baked directional lighting.
Normal
small surface detail.
Roughness
how rough or glossy the material appears.
Metallic
which surfaces behave as metal.
Emission
self-illuminated areas.
AI-generated textures can sometimes bake highlights and shadows directly into the base color.
That becomes a problem when your game engine adds completely different lighting.
Imagine the model contains a bright highlight painted onto its left side.
Then you rotate the in-game light to the right.
The model now appears lit from both directions.
Always inspect the asset under your game’s lighting, not only the AI tool’s viewer.
Step 8: Fix scale, orientation and pivot
A model can look perfect and still be miserable to use if these are wrong.
Scale
Our generator should be:
1.4 meters tall.
Don’t let one crate be 20 meters tall and another 20 centimeters tall because they came from different generation sessions.
Maintain a project scale convention.
Orientation
Choose what your game considers:
forward
and keep it consistent.
Pivot / origin
Where should the object rotate and be positioned from?
For the Relay Generator, I’d use:
bottom center
because designers will place it on floors.
For a door:
hinge edge
may be more useful.
For a wheel:
axle center.
A bad pivot becomes annoying every single time someone uses the asset.
Fix it once.
Step 9: Create game collision separately
Your visible mesh does not have to be your collision mesh.
In fact, it often shouldn’t be.
Suppose our Relay Generator has:
handles
bolts
pipes
beveled corners
vents.
Players don’t need to physically collide with every one.
Use a simple collision representation.
Maybe:
one box
or:
two boxes
covering the main body.
Why?
Simpler collision is:
- faster
- easier to debug
- more predictable
- often better for gameplay.
Regardless of engine, the principle is the same:
Render geometry and gameplay collision have different jobs.
Step 10: Build LODs where they matter
LOD means:
Level of Detail.
The game displays progressively simpler models as objects get farther away.
For example:
LOD0
18,000 triangles
Close view

LOD1
8,000 triangles
Medium distance

LOD2
2,500 triangles
Far distance
Those numbers are illustrative, not universal targets.
The idea matters more than the exact values.
A generator visible from 50 meters away doesn’t need the same geometry used when the player stands beside it.
Whether you need manual LODs depends on your platform, scene density and rendering technology.
Test rather than assuming.
Step 11: Choose the right export format
For many game-development workflows, a simple rule is:
FBX
Strong choice for:
Unity
Unreal
animation pipelines
traditional DCC workflows.
GLB / glTF
Strong choice for:
web applications
WebGL
portable real-time assets
self-contained distribution.
GLB can package geometry, materials and textures into one convenient binary file.
OBJ
Useful for:
simple geometry interchange.
But it has fewer capabilities for modern animated pipelines.
For our Relay Generator, I’d probably keep:
editable source
plus:
FBX for Unity/Unreal
and optionally:
GLB for browser/web use.
Step 12: Import into Unity
After importing the Relay Generator, verify:
Scale
Does 1 Unity unit correspond to the project convention?
Normals
Does shading look correct?
Materials
Were materials generated/imported as expected?
Texture maps
Base Color
Normal
Metallic
Roughness or equivalent workflow.
Pivot
Can designers place the object easily?
Collider
Is gameplay collision appropriate?
Performance
Is the asset complexity appropriate for how often it appears?
Never stop at:
Unity successfully imported the file.
Import success is merely the beginning of validation.
Step 13: Import into Unreal Engine
After importing, inspect the asset in the Static Mesh Editor.
Verify:
scale
orientation
materials
UV channels
collision
LOD configuration
normals/tangents
texture assignments.
Imported materials should be inspected rather than trusted blindly.
That advice is especially relevant for AI-generated assets.
Step 14: Test the asset inside an actual level
This is the equivalent of playtesting a sprite.
Place the generator in the environment where it will actually appear.
Now ask:
Does the scale feel correct?
A mathematically correct 1.4-meter machine may still feel too small relative to the game’s stylization.
Is the silhouette readable?
Does it disappear into the background?
Does the texture fit the art direction?
AI often produces more detail than the rest of the game.
Does it light properly?
Look under:
daylight
dark interiors
colored lights
emissive environments.
Does collision feel right?
Can the player unexpectedly snag on the corners?
Is performance acceptable when duplicated?
One prop may run fine.
What happens with 100?
That’s a much more useful test.
Step 15: Create an asset QA record
Treat generated 3D models as production assets.
For example:
{
  "id": "prop_relay_generator",
  "type": "static_prop",
  "source": "ai_generated",
  "heightMeters": 1.4,
  "format": "fbx",
  "trianglesLod0": 12400,
  "materials": 2,
  "textureResolution": 2048,
  "uvChecked": true,
  "normalsChecked": true,
  "collisionChecked": true,
  "pivot": "bottom-center",
  "unityImport": "pass",
  "unrealImport": "pass",
  "status": "approved"
}
Now we’re not saying:
It looks okay.
We’re saying:
It passed the asset contract.
That difference becomes crucial when AI dramatically increases how many assets a small team can create.
A Blinkcade AI 3D prompt template
Use something like:
ASSET
Name and type.

GAMEPLAY ROLE
How the player interacts with it.

TARGET ENGINE
Unity / Unreal / Godot / Web / other.

OBJECT SCALE
Real-world dimensions.

CAMERA / REFERENCE
Relevant concept or views.

SILHOUETTE
Major readable forms.

MATERIALS
Metal / plastic / stone / organic / etc.

PALETTE
Primary and accent colors.

DETAIL LEVEL
Low / medium / hero asset.

ANIMATION
Static / rigid animation / character deformation.

GEOMETRY REQUIREMENTS
No floating components.
Avoid unnecessary interior geometry.
Avoid extremely thin unsupported pieces.

TEXTURE REQUIREMENTS
PBR-ready.
No baked directional lighting.
Clear material separation.

AVOID
Text.
Logos.
Tiny decorative geometry.
Unnecessary holes.
Complex invisible surfaces.
The more the prompt describes the production requirements, the more useful the result becomes.
Common AI 3D asset problems
The model is far too dense
Fix: remesh or retopologize.
The texture looks great only in the AI preview
Cause: baked lighting or viewer-specific rendering.
Fix: inspect individual PBR maps and test under game lighting.
The object imports at the wrong size
Fix: enforce project scale and verify export/import units.
The object rotates strangely
Cause: bad pivot.
Fix: place the origin intentionally.
Character animation collapses
Cause: poor deformation topology or rig.
Fix: retopologize before rigging or use a better production mesh.
Textures disappear after export
Depending on the format, textures may be embedded or stored separately.
Unreal imports the mesh but the material looks wrong
Inspect the material graph and texture assignments rather than trusting the default import result.
The complete AI 3D game-asset pipeline
For production, use:
1. Brief
Define function, scale and target platform.
2. Reference
Create or approve the visual design.
3. Generate
Text-to-3D or image-to-3D.
4. Inspect geometry
Turn textures off.
5. Optimize
Remesh or retopologize where necessary.
6. Check UVs
Stretching, overlap, density.
7. Check textures
Base color, normal, roughness, metallic, emission.
8. Fix scale
Use project conventions.
9. Fix orientation
Consistent forward/up axes.
10. Fix pivot
Based on how the asset will be used.
11. Add collision
Prefer simple gameplay collision.
12. Create LODs
When appropriate.
13. Export
Choose FBX, GLB or another suitable format.
14. Import
Unity, Unreal or target engine.
15. Validate in-engine
Materials, lighting, collision and performance.
16. Approve
Record the asset as production ready.
Blinkcade verdict
AI 3D generation is becoming extraordinarily useful for game development because it compresses what used to be a lengthy modeling process into a very fast starting point.
But the wrong mental model is:
AI generates a 3D model, therefore the asset is finished.
The better model is:
AI creates the first production candidate.
For our Relay Generator:
brief → reference → generation → mesh inspection → optimization → UV/texture QA → scale/pivot → collision → FBX → Unity/Unreal → level test → approval
The AI may eliminate hours of initial modeling.
It does not eliminate the need for asset engineering.
And as AI makes it possible for small teams to generate hundreds or thousands of 3D objects, that engineering discipline becomes even more valuable.
The competitive advantage won’t simply be:
Who can generate the most models?
It will be:
Who can reliably turn generated models into a coherent, performant, shippable game?
Sources & verification
- Meshy — Export formats: https://docs.meshy.ai/en/webapp/guides/platform/export-formats
- Meshy — Image to 3D: https://docs.meshy.ai/en/api/image-to-3d
- Tripo — Supported 3D formats: https://www.tripo3d.ai/help/getting-started/what-3d-file-formats-do-you-support
- Unity — Importing model files: https://docs.unity3d.com/6000.5/Documentation/Manual/ImportingModelFiles.html
- Unity — 3D formats: https://docs.unity3d.com/6000.5/Documentation/Manual/3D-formats.html
- Unreal Engine — FBX Static Mesh Pipeline: https://dev.epicgames.com/documentation/unreal-engine/fbx-static-mesh-pipeline-in-unreal-engine
- Unreal Engine — FBX Content Pipeline: https://dev.epicgames.com/documentation/unreal-engine/fbx-content-pipeline
Last verified: September 3, 2026
Blinkcade original contribution: production-oriented AI 3D asset contract, Relay Generator example pipeline, geometry/UV/material QA framework, pivot and collision methodology, engine-import checklist, structured asset approval record and end-to-end game-readiness workflow.